


 雷达卡
雷达卡


一、概述
1.1 配置信息
Ubuntu版本:Ubuntu 22.04.5 LTS
硬件平台:树莓派M4
1.2 MySql数据库简介
MySQL 是一款广受欢迎的关系型数据库管理系统,最初由瑞典的 MySQL AB 公司研发,现隶属于 Oracle 公司旗下。在 Web 应用开发领域,MySQL 被公认为是最优秀的 RDBMS(关系数据库管理系统)软件之一。
该系统采用关系模型存储数据,将信息分散至多个关联表中,而非集中于单一数据库仓库,从而提升了访问速度与操作灵活性。这种结构设计使得数据管理更加高效且易于维护。
MySQL 使用 SQL(结构化查询语言)作为其标准数据库访问语言,广泛应用于各类项目中。其软件采用双授权模式,分为开源的社区版和功能更全面的商业版本。凭借体积轻巧、运行高效以及总体拥有成本低的优势,特别是其开放源码特性,MySQL 成为众多中小型乃至大型网站首选的数据库解决方案。
二、安装数据库
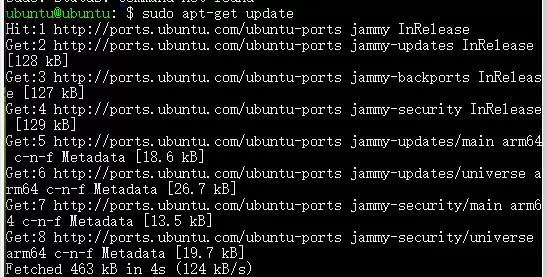
2.1 更新系统
在开始安装前,首先确保系统包列表为最新状态,执行以下命令:
ubuntu@ubuntu:~$ sudo apt-get update
2.2 安装mysql服务
使用 APT 包管理器安装 MySQL 服务器组件:
sudo apt-get install mysql-server
完整命令示例如下:
ubuntu@ubuntu:~$ sudo apt-get install mysql-server
Reading package lists... Done
Building dependency tree... Done
Reading state information... Done
...
After this operation, 238 MB of additional disk space will be used.
Do you want to continue? [Y/n] y
Get:1 http://ports.ubuntu.com/ubuntu-ports jammy/main arm64
...
done!
update-alternatives: using /var/lib/mecab/dic/ipadic-utf8 to provide /var/lib/mecab/dic/debian (mecab-dictionary) in auto mode
Setting up libhtml-parser-perl:arm64 (3.76-1build2) ...
Setting up libhttp-message-perl (6.36-1) ...
Setting up mysql-server-8.0 (8.0.44-0ubuntu0.22.04.1) ...
update-alternatives: using /etc/mysql/mysql.cnf to provide /etc/mysql/my.cnf (my.cnf) in auto mode
Renaming removed key_buffer and myisam-recover options (if present)
mysqld will log errors to /var/log/mysql/error.log
mysqld is running as pid 25637
dpkg: error processing package mysql-server-8.0 (--configure):
installed mysql-server-8.0 package post-installation script subprocess returned error exit status 1
Setting up libcgi-pm-perl (4.54-1) ...
2.3 启动数据库服务
完成安装后,需对服务进行配置并启动。
2.3.1 重新加载服务
刷新 systemd 服务列表,以识别新添加的服务文件:
sudo systemctl daemon-reexec
sudo systemctl daemon-reload
2.3.2 启动mysql80服务
启动已安装的 MySQL 服务:
sudo systemctl start mysql
2.3.3 设置开机自启动
为保证数据库随系统启动自动运行,启用开机自启功能:
sudo systemctl enable mysql
2.3.4 查看服务状态
检查当前 MySQL 服务运行状态是否正常:
sudo systemctl status mysql
2.4 修改配置文件
2.4.1 进入mysql的配置文件路径“/etc/mysql/mysql.conf.d”
进入默认配置目录:
cd /etc/mysql/mysql.conf.d
2.4.2 赋值mysql.cnf为mysqld80.cnf文件并修改
复制原始配置文件并重命名为 mysqld80.cnf,便于后续独立管理:
sudo cp mysql.cnf mysqld80.cnf
根据实际需求编辑该文件,调整端口、绑定地址或日志设置等参数。
2.4.3 初始化数据库
若需要手动初始化数据目录(通常非必需),可使用如下命令:
sudo mysqld --initialize --user=mysql --basedir=/usr --datadir=/var/lib/mysql
2.4.4 创建服务配置文件
切换到 systemd 服务目录:
cd /etc/systemd/system
创建自定义服务单元文件,例如 mysql80.service,用于精确控制服务行为。
2.4 配置数据库
2.4.1 链接数据库
通过本地命令行连接 MySQL 服务:
mysql -u root -p
输入安装过程中设定的密码即可登录。
2.4.2 创建用户
登录后可在 MySQL 命令行中创建新用户,示例语句如下:
CREATE USER 'newuser'@'localhost' IDENTIFIED BY 'password';
GRANT ALL PRIVILEGES ON *.* TO 'newuser'@'localhost';
FLUSH PRIVILEGES;
悟剑声
诗号:天外情风吹云立,红尘飞雨悟剑声。
一位神秘现身于雷雨交加之中的少年剑客,身法迅捷如电,剑招奇特非凡,每一式皆蕴含紫电之气。在失路英雄遭末世圣传追杀之际挺身而出施以援手,并于天玄谷与啸日猋及失路英雄联手设局,成功擒获宿贤卿。其身份成谜,武功来历不明,令人充满遐想。

Errors were encountered during package processing:
- mysql-server-8.0
- mysql-server
Dependency issues prevented the configuration of mysql-server:
mysql-server depends on mysql-server-8.0, but mysql-server-8.0 has not been configured yet.
Additional system actions logged:
- Setting up libhtml-template-perl (2.97-1.1) ...
- Setting up libcgi-fast-perl (1:2.15-1) ...
- Processing triggers for man-db (2.10.2-1) ...
- Processing triggers for libc-bin (2.35-0ubuntu3.11) ...
No apport report was generated, as the error appears to be a follow-up from a prior failure.
needrestart is skipped due to dpkg failure.
E: Sub-process /usr/bin/dpkg returned an error code (1)
Note: This system already contains a MySQL service. A reconfiguration of the database is required. For new installations, proceed with standard setup procedures.
2.3 Check MySQL Version
Run the following command to verify the installed version:
ubuntu@ubuntu:~$ mysql --version
Sample output:
mysql Ver 8.0.44-0ubuntu0.22.04.1 for Linux on aarch64 ((Ubuntu))
If the version is displayed, the installation or partial setup is confirmed successful.
2.4 Modify Configuration File
2.4.1 Navigate to MySQL Configuration Directory
Access the configuration path:
ubuntu@ubuntu:~$ cd /etc/mysql/mysql.conf.d
List contents to confirm files:
ubuntu@ubuntu:/etc/mysql/mysql.conf.d$ ll
total 16
drwxr-xr-x 2 root root 4096 Nov 25 16:52 ./
drwxr-xr-x 4 root root 4096 Nov 25 17:07 ../
-rw-r--r-- 1 root root  132 Jun 10 01:51 mysql.cnf
-rw-r--r-- 1 root root 2220 Jun 10 01:51 mysqld.cnf
2.4.2 Duplicate and Edit Configuration File
Create a copy of the main config file for customized use:
ubuntu@ubuntu:/etc/mysql/mysql.conf.d$ sudo cp mysqld.cnf mysqld80.cnf
Verify the new file exists:
ubuntu@ubuntu:/etc/mysql/mysql.conf.d$ ll
total 20
drwxr-xr-x 2 root root 4096 Nov 25 18:07 ./
drwxr-xr-x 4 root root 4096 Nov 25 17:07 ../
-rw-r--r-- 1 root root  204 Nov 25 17:11 mysql.cnf
-rw-r--r-- 1 root root 2220 Jun 10 01:51 mysqld.cnf
-rw-r--r-- 1 root root 2220 Nov 25 18:07 mysqld80.cnf
Edit the copied file using vim:
ubuntu@ubuntu:/etc/mysql/mysql.conf.d$ sudo vim mysqld80.cnf
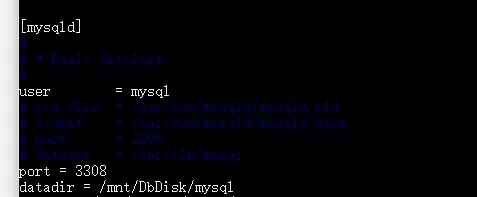
Add the following settings under the [mysqld] section:
[mysqld]
port=3308
datadir=/mnt/DbDisk/mysql
socket=/mnt/DbDisk/mysql/mysql.sock
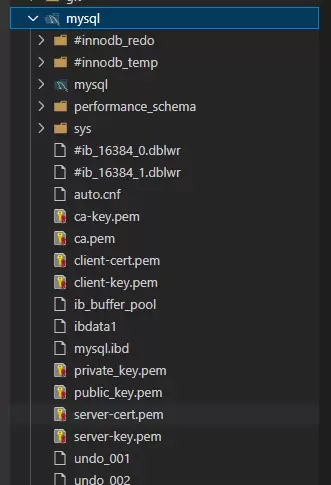
Note: The directory /mnt/DbDisk/mysql is a pre-created storage location for database files.
2.4.3 Initialize the Database
Use the custom configuration file to initialize MySQL without a temporary password:
sudo mysqld --defaults-file=/etc/mysql/mysql.conf.d/mysqld80.cnf --initialize-insecure
2.4.4 Create Service Configuration File
To manage the MySQL instance via systemd, create a dedicated service unit file. This allows proper control over startup, shutdown, and status monitoring using systemctl.
进入系统服务文件所在目录:
ubuntu@ubuntu:~$ cd /etc/systemd/system/
创建 MySQL 实例的服务配置文件:
ubuntu@ubuntu:/etc/systemd/system$ sudo vim mysql80.service
在编辑器中输入以下服务定义内容:
[Unit]
Description=MySQL Server (Instance 2)
After=network.target

[Service]
User=mysql
Group=mysql
ExecStart=/usr/sbin/mysqld --defaults-file=/etc/mysql/mysql.conf.d/mysqld80.cnf
Restart=on-failure
RestartPreventExitStatus=1
PrivateTmp=true

[Install]
WantedBy=multi-user.target
启动并管理数据库服务
完成配置文件编写后,执行如下步骤以激活并运行新实例。
重新加载 systemd 配置
使系统识别新增的服务单元文件。
ubuntu@ubuntu:/etc/systemd/system$ sudo systemctl daemon-reload
启动 mysql80 服务
sudo systemctl start mysql80
设置开机自启
确保服务器重启后服务能自动运行。
ubuntu@ubuntu:/etc/systemd/system$ sudo systemctl enable mysql80
检查服务当前状态
ubuntu@ubuntu:/etc/systemd/system$ sudo systemctl status mysql80
● mysql80.service - MySQL Server (Instance 2)
Loaded: loaded (/etc/systemd/system/mysql80.service; enabled; vendor preset: enabled)
Active: active (running) since Tue 2025-11-25 19:51:32 CST; 15s ago
Main PID: 71889 (mysqld)
Tasks: 12 (limit: 4421)
Memory: 271.8M
CPU: 1.005s
CGroup: /system.slice/mysql80.service
└─71889 /usr/sbin/mysqld --defaults-file=/etc/mysql/mysql.conf.d/mysqld80.cnf
Nov 25 19:51:32 ubuntu systemd[1]: Started MySQL Server (Instance 2).
若显示 active (running) 表示服务已成功启动,enabled 表示已启用开机自启功能。
数据库初始化配置
连接到 MySQL 实例
使用管理员账户登录数据库。由于本例中修改了监听地址和端口,需指定主机和端口号进行连接。
ubuntu@ubuntu:/etc/mysql/mysql.conf.d$ sudo mysql -u root -p -h 127.0.0.1 -P 3308
初次安装默认无密码,直接按回车键即可登录。
Enter password:
Welcome to the MySQL monitor.  Commands end with ; or \g.
Your MySQL connection id is 10
Server version: 8.0.44-0ubuntu0.22.04.1 (Ubuntu)

Copyright (c) 2000, 2025, Oracle and/or its affiliates.
Oracle is a registered trademark of Oracle Corporation and/or its
affiliates. Other names may be trademarks of their respective
owners.
Type 'help;' or '\h' for help. Type '\c' to clear the current input statement.

mysql>
创建专用用户并授权
切换至 mysql 系统数据库,用于管理用户权限信息。
use mysql
创建本地访问用户 gitea,并设置密码:
CREATE USER 'gitea'@'localhost' IDENTIFIED BY 'gitea2025';
授予该用户所有数据库的全部操作权限:
grant all on *.* to 'gitea'@'localhost';
如需兼容旧客户端,可调整用户的密码加密方式(根据实际需求选择是否执行)。
update user set plugin="mysql_native_password";

flush privileges;

quit;
# 三、访问数据库
 使用用户名访问数据库

```css
ubuntu@ubuntu:/etc/systemd/system$ sudo mysql -u gitea -p -h 127.0.0.1 -P 3308
Enter password:
Welcome to the MySQL monitor.  Commands end with ; or \g.
Your MySQL connection id is 26
Server version: 8.0.44-0ubuntu0.22.04.1 (Ubuntu)

Copyright (c) 2000, 2025, Oracle and/or its affiliates.

Oracle is a registered trademark of Oracle Corporation and/or its
affiliates. Other names may be trademarks of their respective
owners.

Type 'help;' or '\h' for help. Type '\c' to clear the current input statement.

mysql>
 京公网安备 11010802022788号


